> ## Documentation Index
> Fetch the complete documentation index at: https://docs.mayil.ai/llms.txt
> Use this file to discover all available pages before exploring further.
# Jira
## Installing Mayil's Jira integration
*Estimated setup time: 20 minutes*
Mayil's Jira integration consists of a OAuth 2.0 app and a webhook. The general instructions to install a Jira OAuth 2.0 is outlined [here](https://developer.atlassian.com/cloud/confluence/oauth-2-3lo-apps/). Information on how to set up a webhook is outlined [here](https://developer.atlassian.com/server/jira/platform/webhooks/#registering-a-webhook-via-the-jira-administration-console)
## Prerequisites
1. Admin access to Jira
2. Enable OAuth 2.0 in the [developer console](https://developer.atlassian.com/cloud/confluence/oauth-2-3lo-apps/#:~:text=app%20using%20the-,developer%20console,-.)
## Setting up a OAuth 2.0 integration
1. From any page on developer.atlassian.com, select your profile icon in the top-right corner, and from the dropdown, select My apps.
2. Select create ➤ OAuth 2.0 integration. You should see something like this-
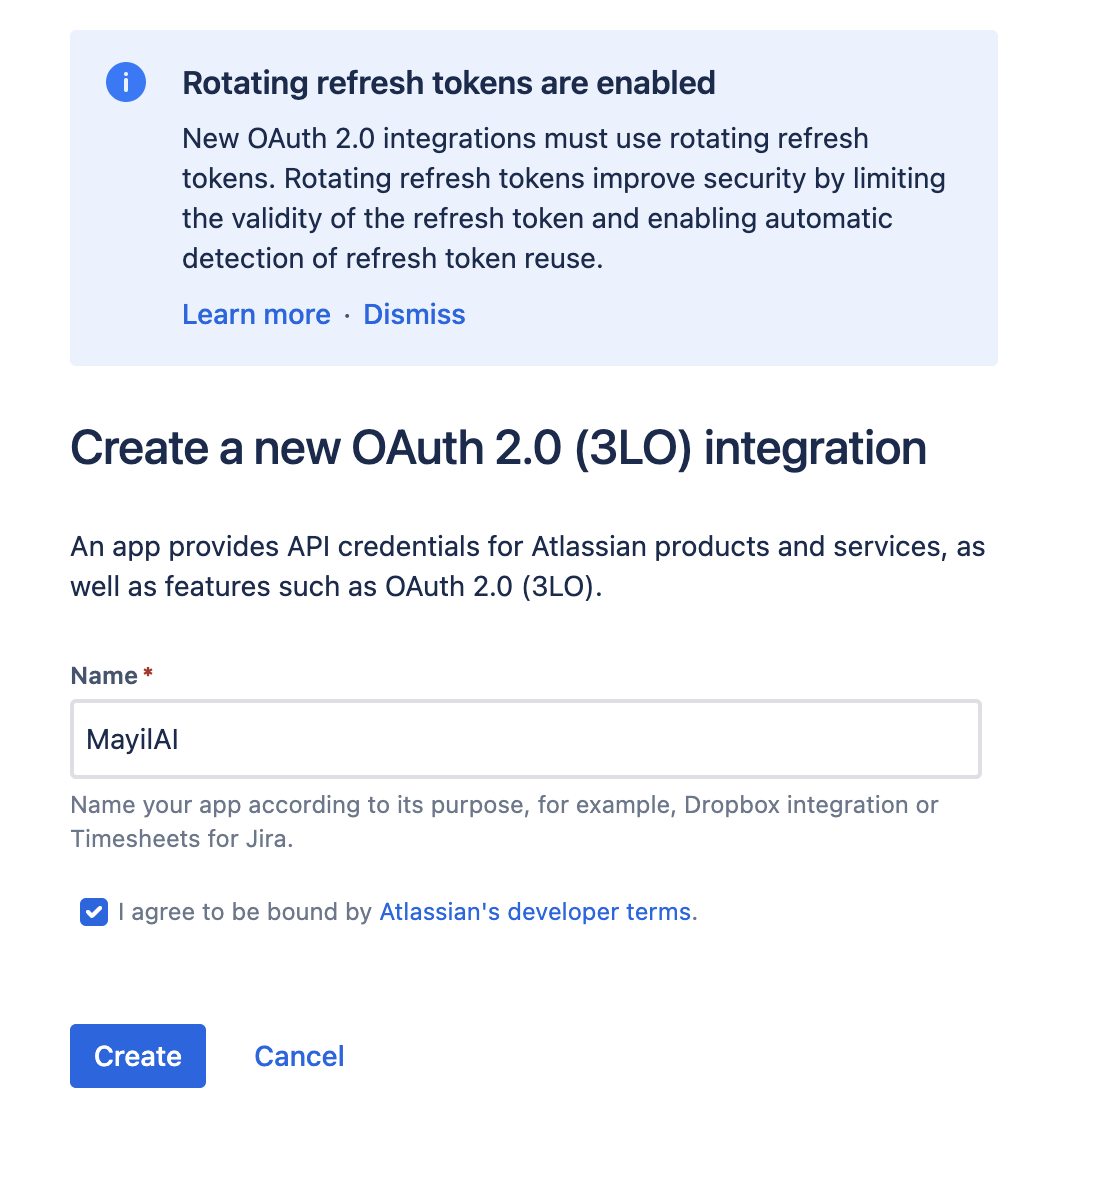 3. Name the app MayilAI. Once created, you should see something like this-
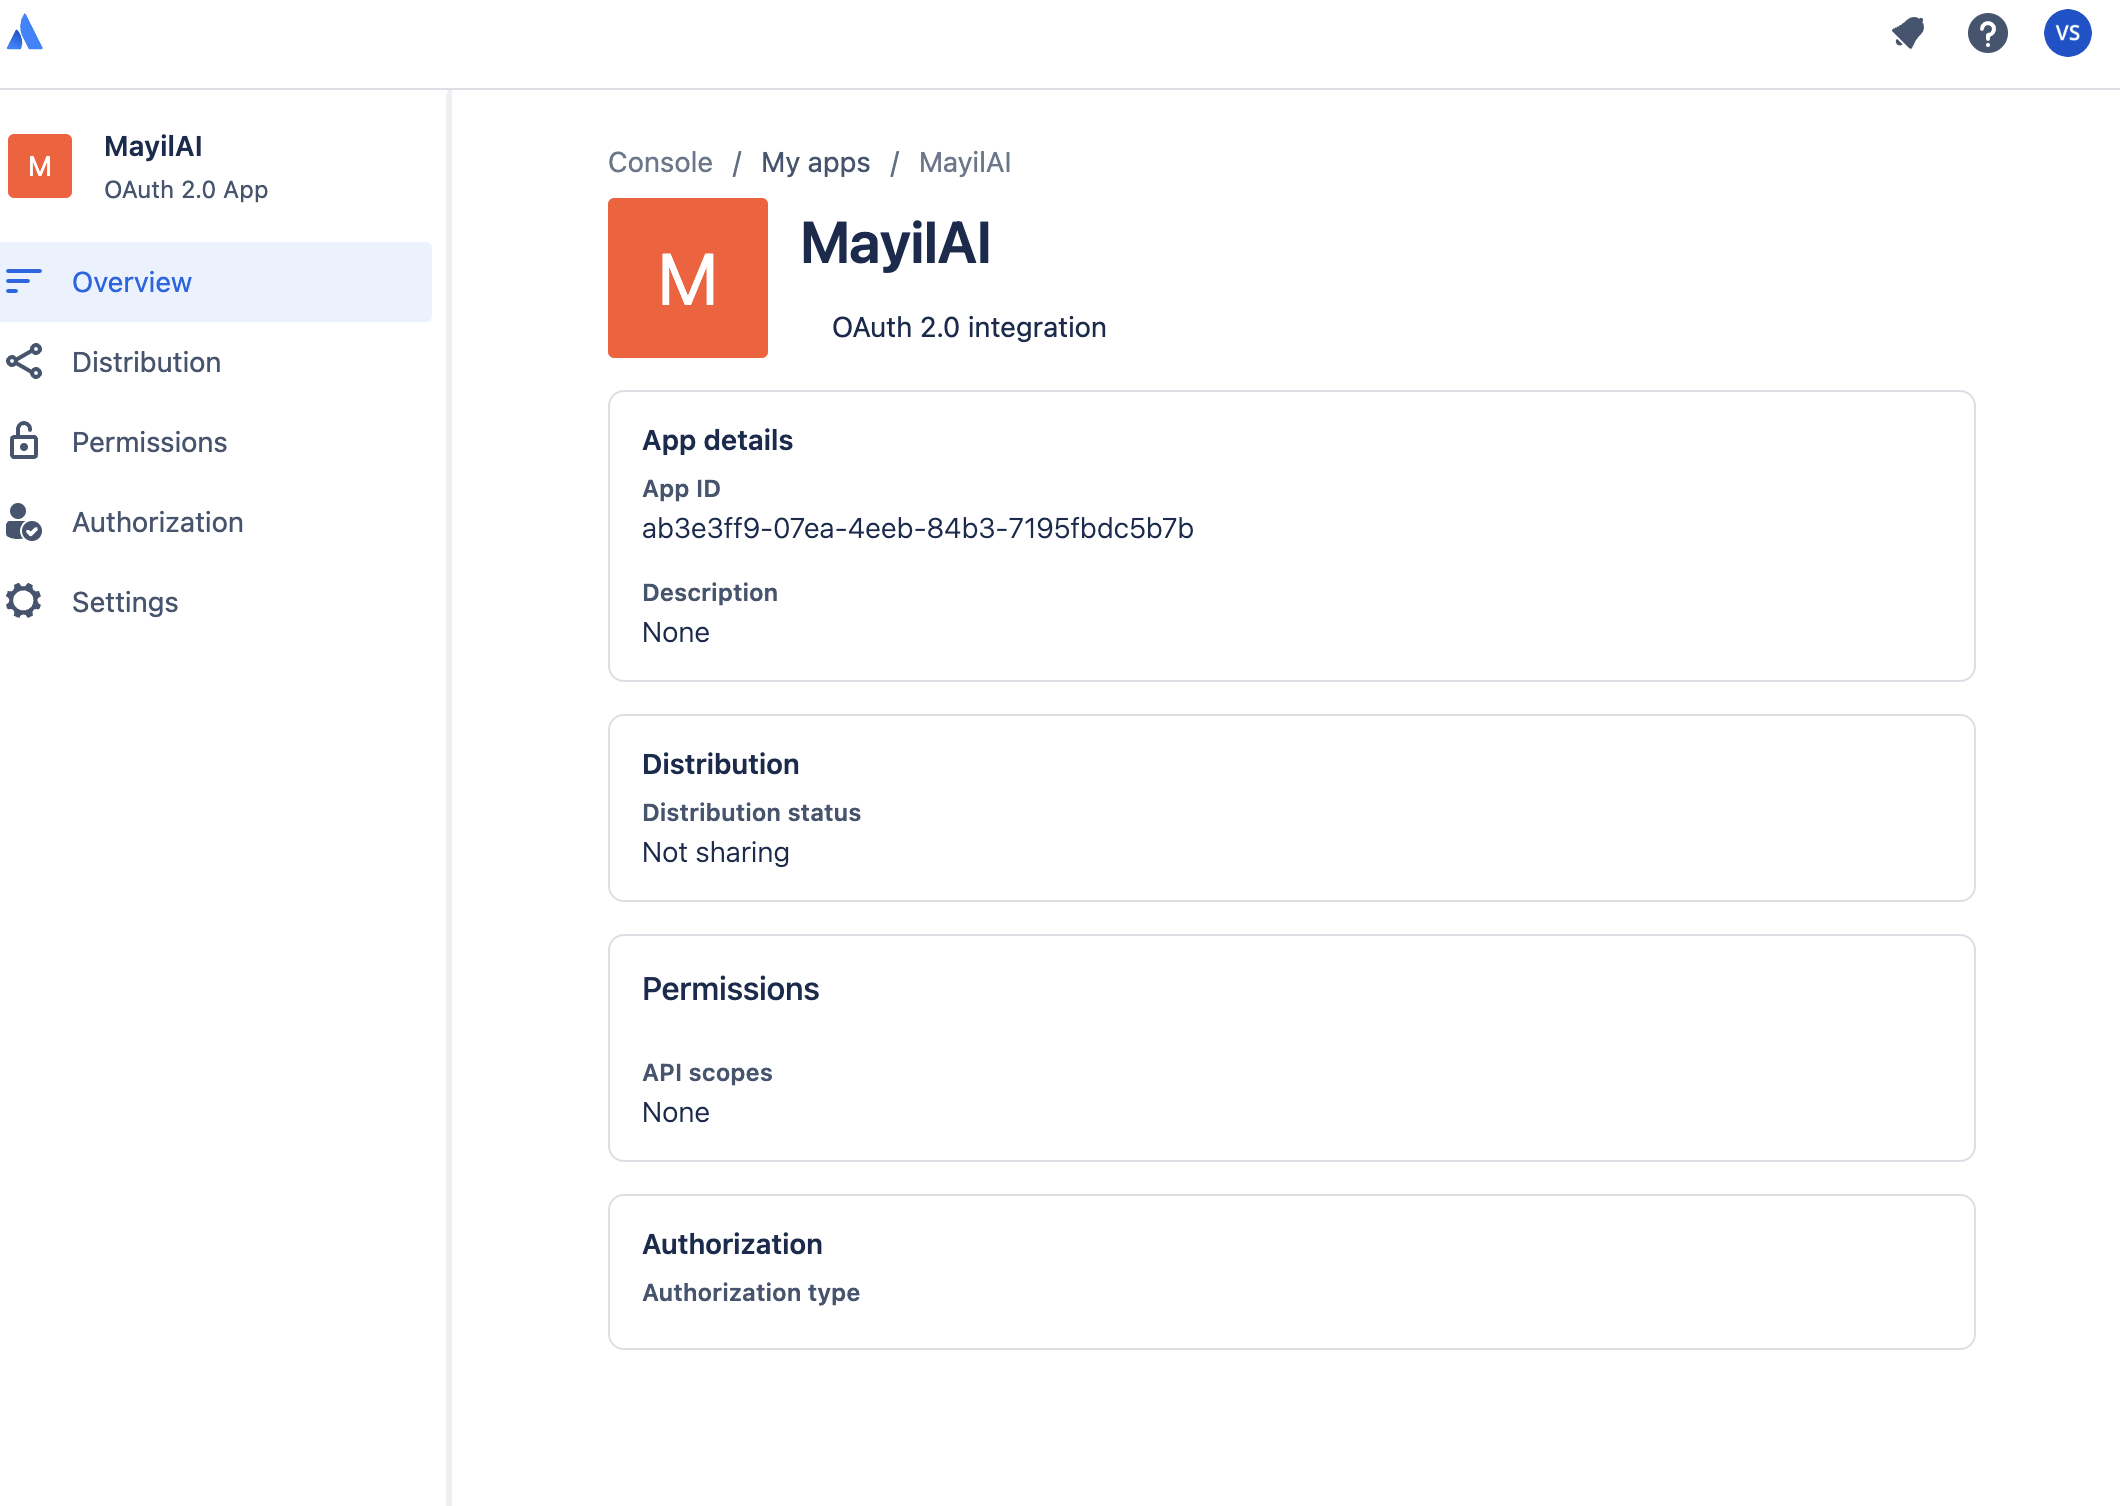 4. Go to Authorization. Add a new authorization for OAuth 2.0 (3LO)-
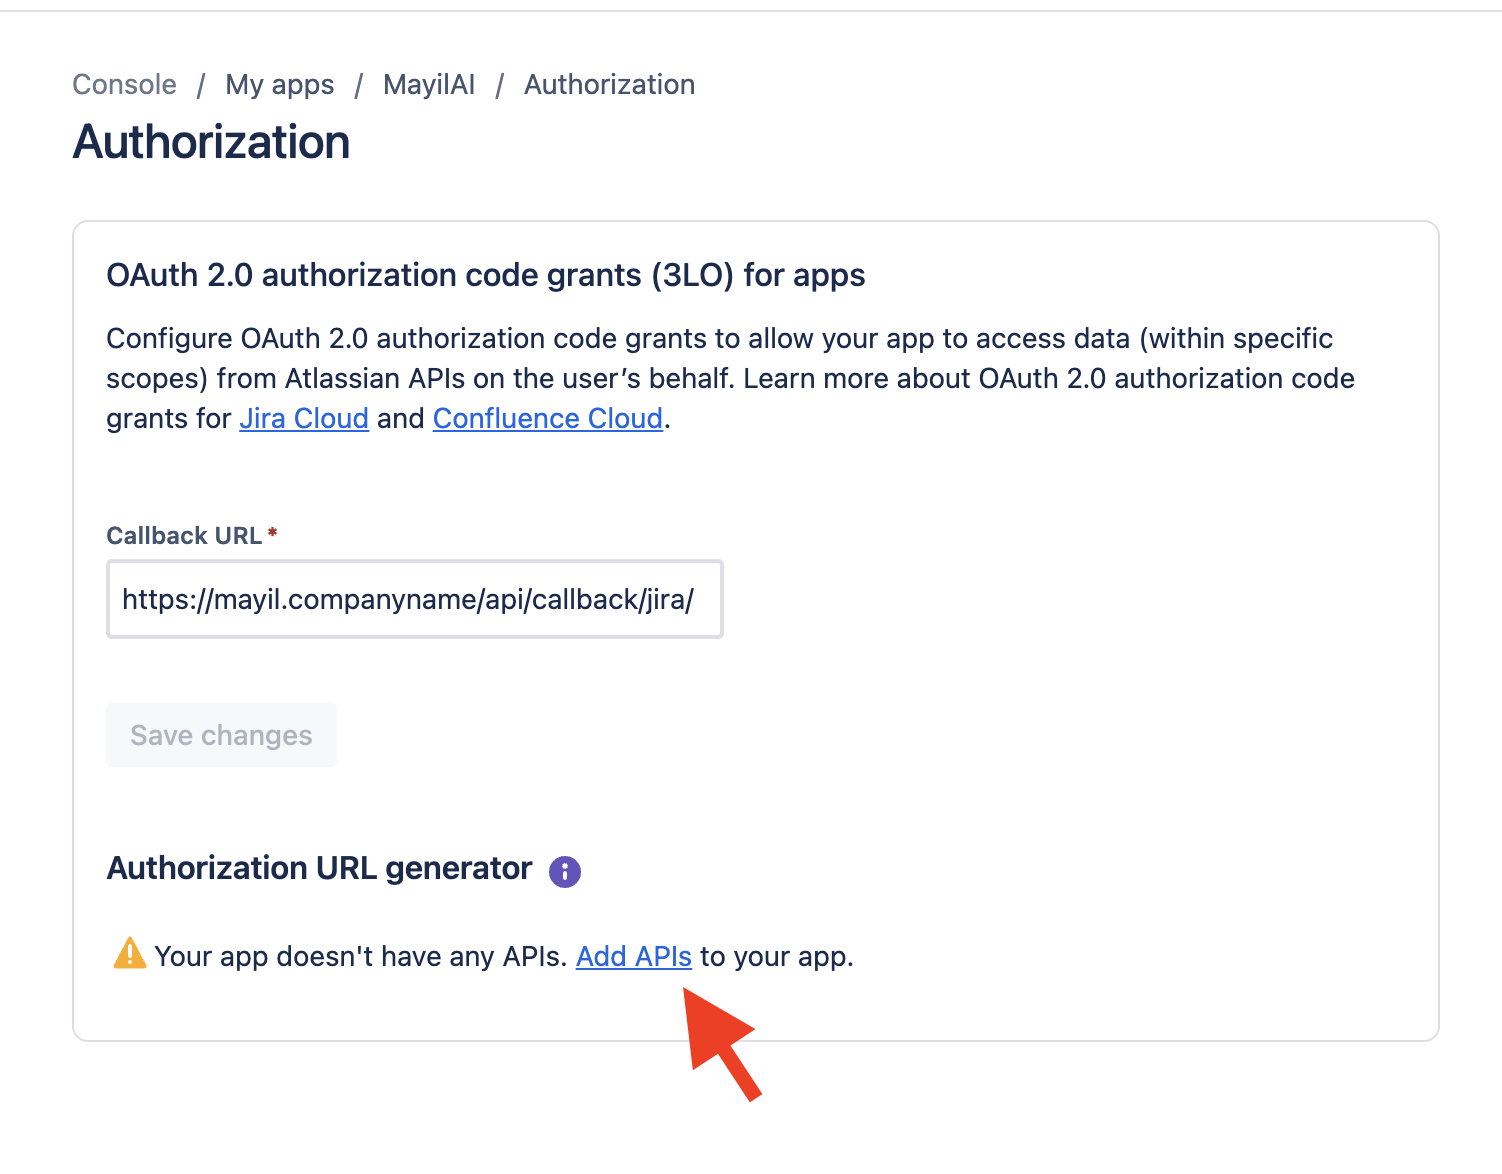
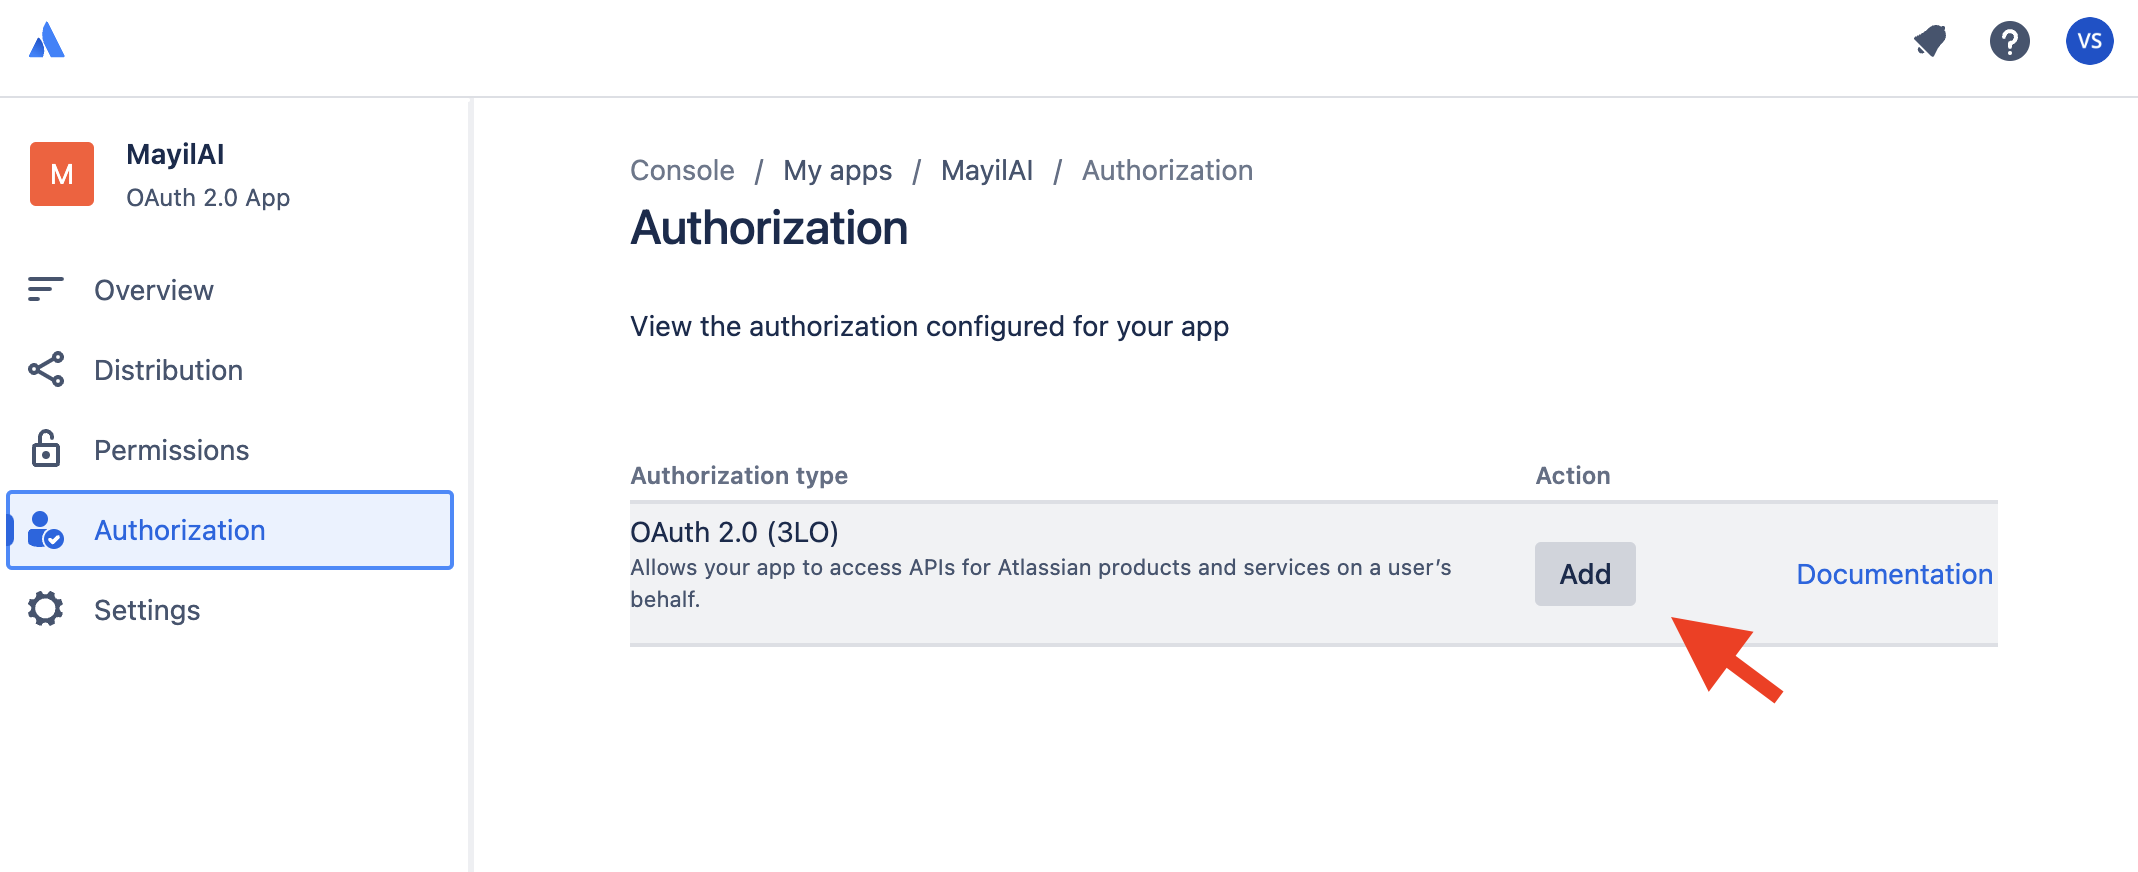 5. You will now be prompted to enter a callback URL. Enter `/api/callback/jira/` where deployment is where Mayil's backend API was deployed (An example would be `https://mayil.companyname/api/callback/jira/`)
6. Add API authorizations by clicking this button-
5. You will now be prompted to enter a callback URL. Enter `/api/callback/jira/` where deployment is where Mayil's backend API was deployed (An example would be `https://mayil.companyname/api/callback/jira/`)
6. Add API authorizations by clicking this button-
 7. Select Add ➤ Configure under `Jira API` and make this selection-
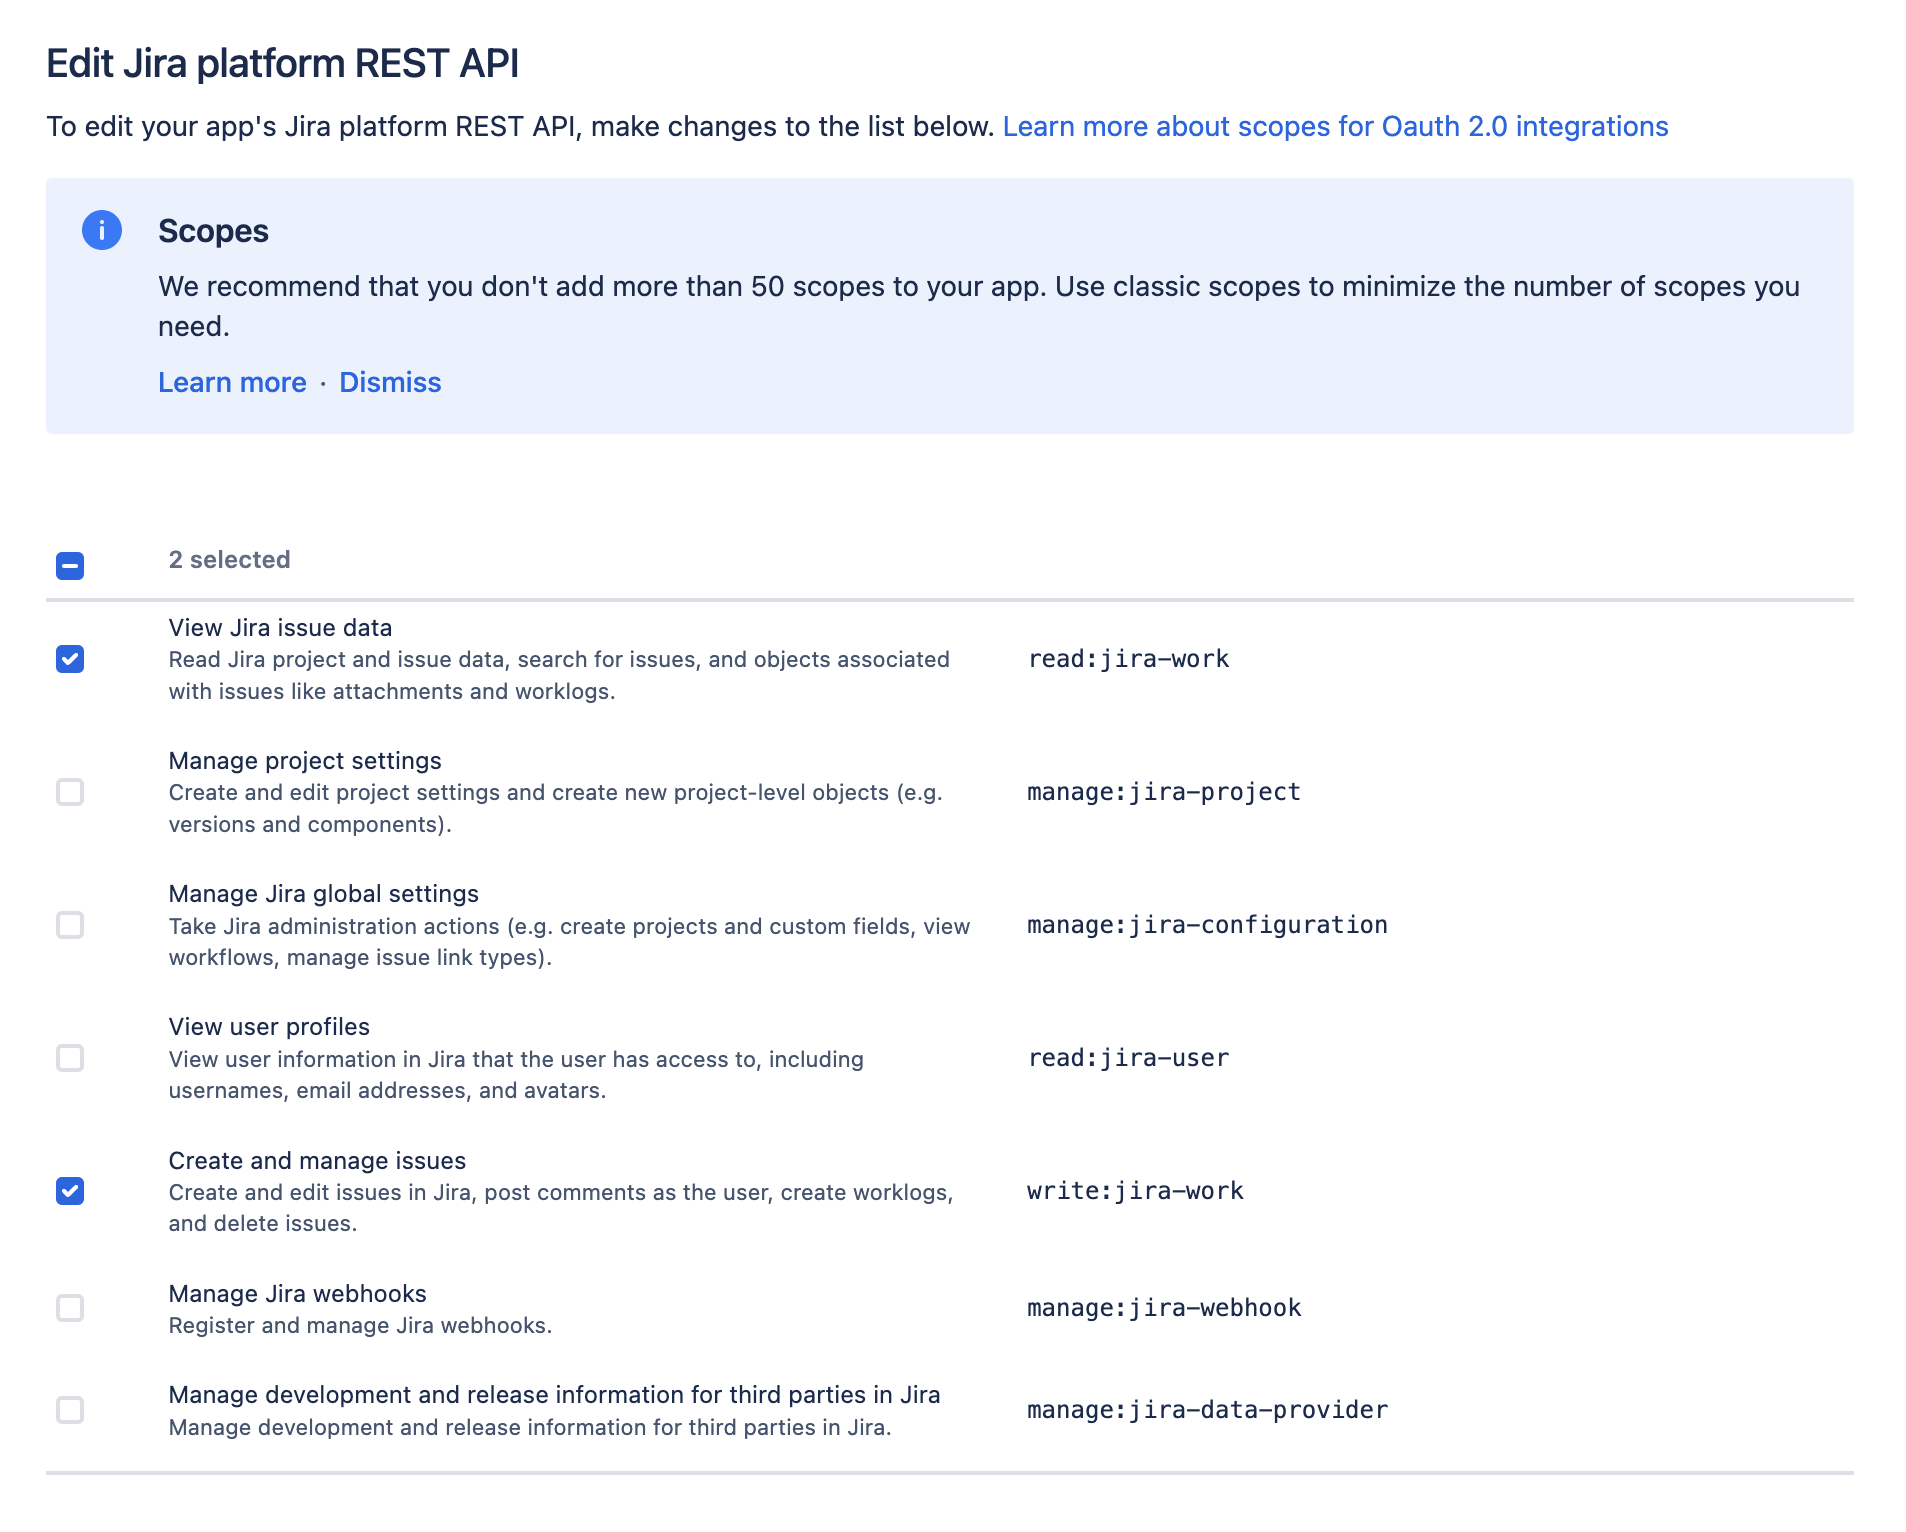 8. Click Save.
## Configuring the app's avatar
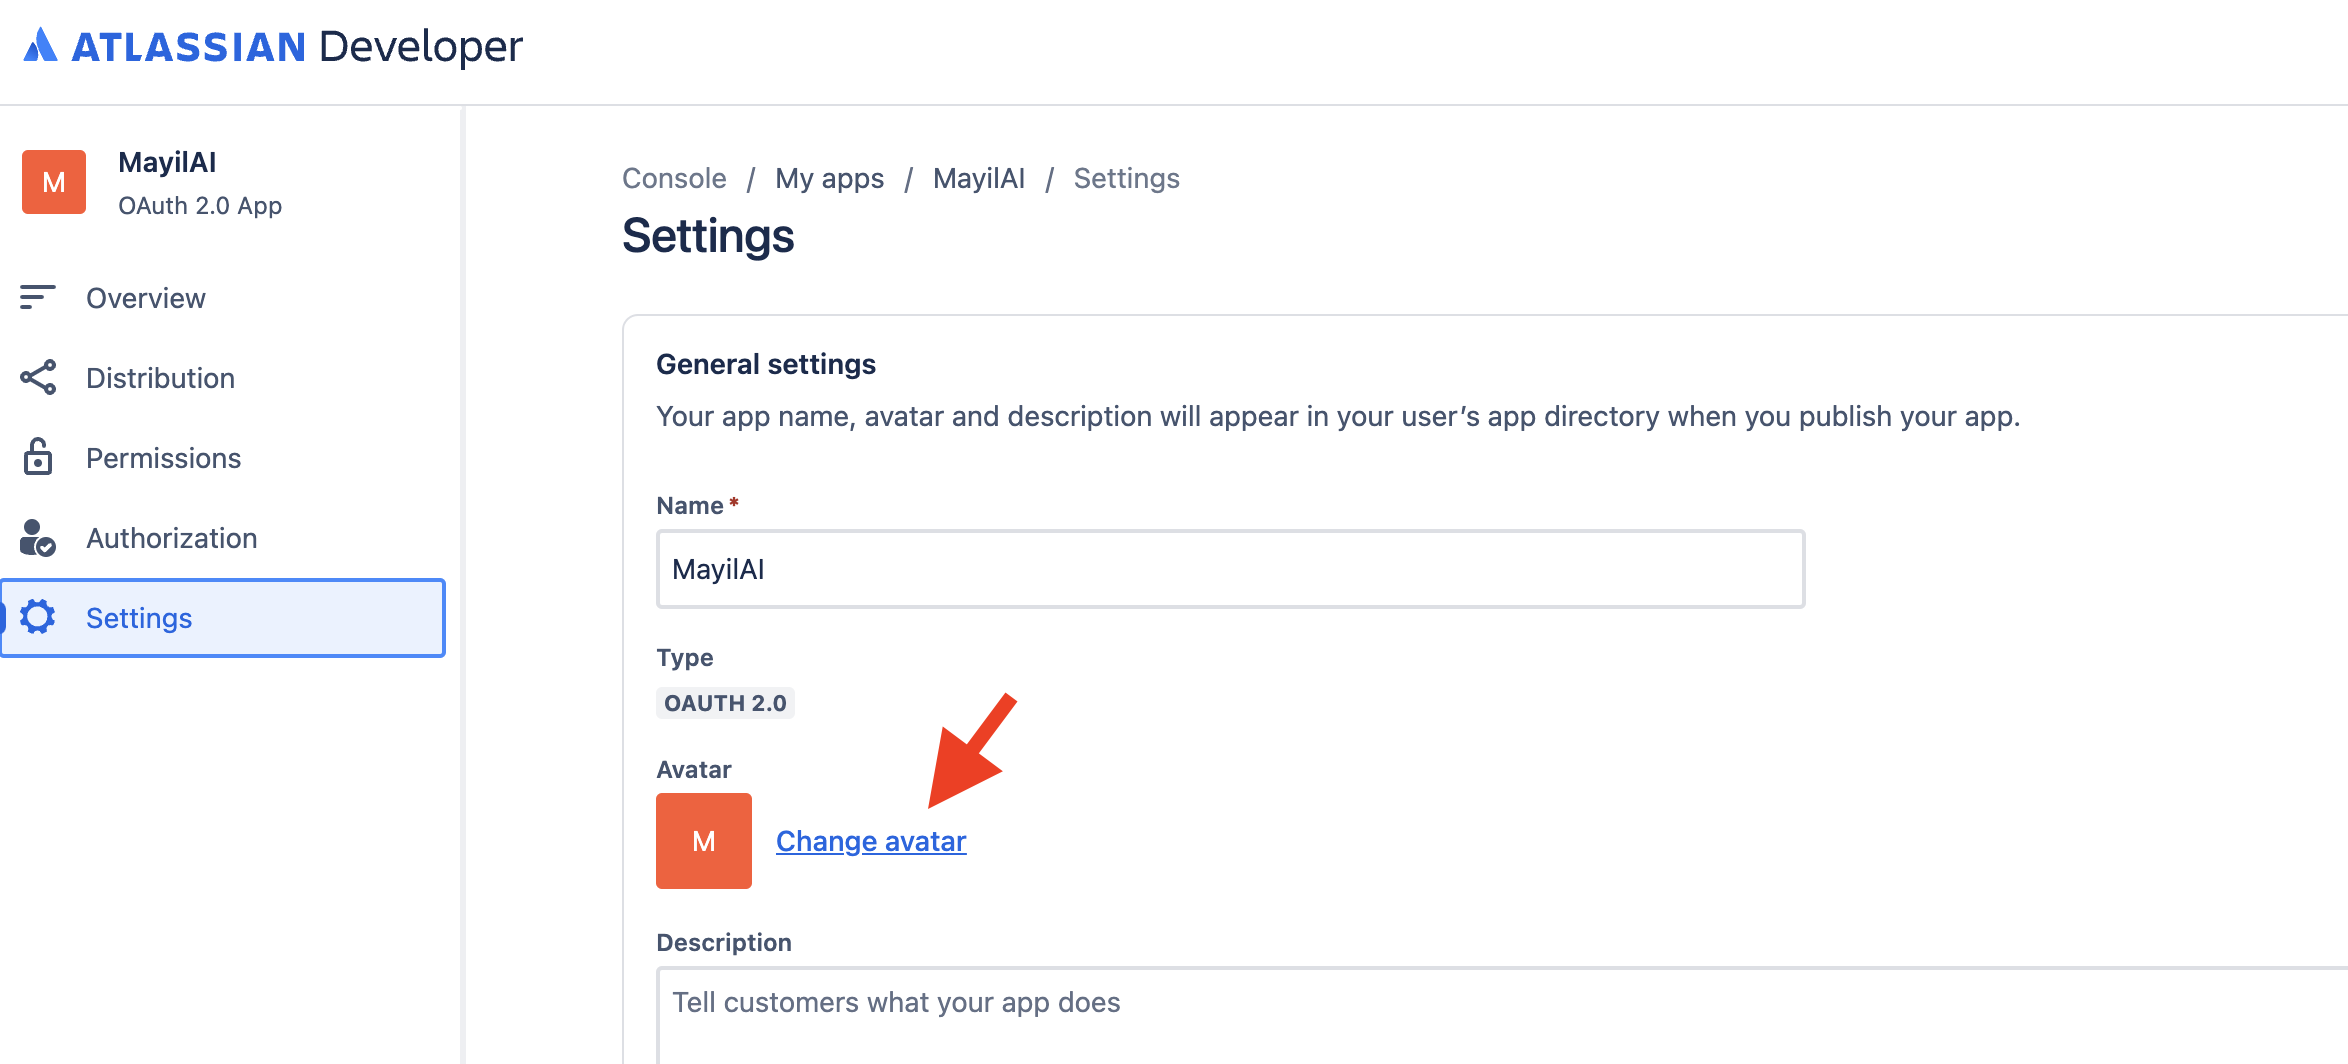
Go to Settings and select Change avatar. Update it to the image provided in the installation package
8. Click Save.
## Configuring the app's avatar
Go to Settings and select Change avatar. Update it to the image provided in the installation package
 ## Configuring Mayil's backend API
Various details generated during the setup process will need to be copied and provided to Mayil's backend API as configuration details. Update this JSON block with all the procured information-
```
{
"integration_type": "jira",
"identifier": "",
"ignore_labels": [ ],
"project": "My Kanban Project",
"secret": "",
"url": "",
"webhook_secret": ""
}
```
1. Go to Settings for your new created OAuth app and copy `Client ID` into `identifier` and copy `secret` into `secret`.
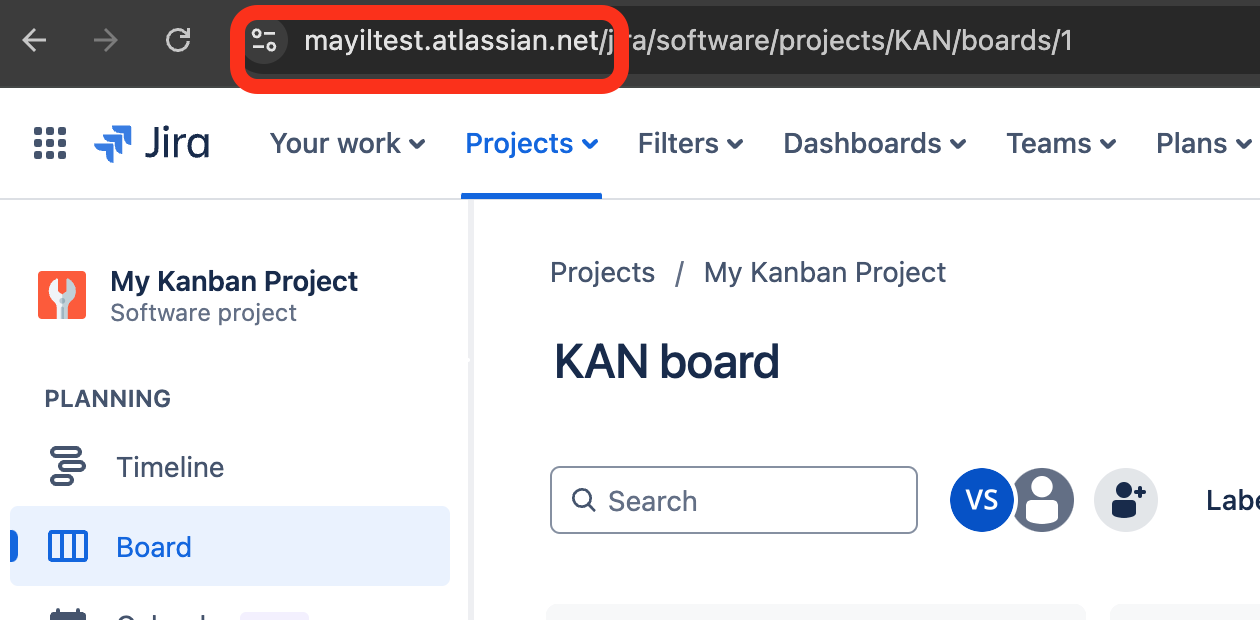
2. Identify the URL in which Jira runs and save that under URL (e.g `https://mayiltest.atlassian.net`)
## Configuring Mayil's backend API
Various details generated during the setup process will need to be copied and provided to Mayil's backend API as configuration details. Update this JSON block with all the procured information-
```
{
"integration_type": "jira",
"identifier": "",
"ignore_labels": [ ],
"project": "My Kanban Project",
"secret": "",
"url": "",
"webhook_secret": ""
}
```
1. Go to Settings for your new created OAuth app and copy `Client ID` into `identifier` and copy `secret` into `secret`.
2. Identify the URL in which Jira runs and save that under URL (e.g `https://mayiltest.atlassian.net`)
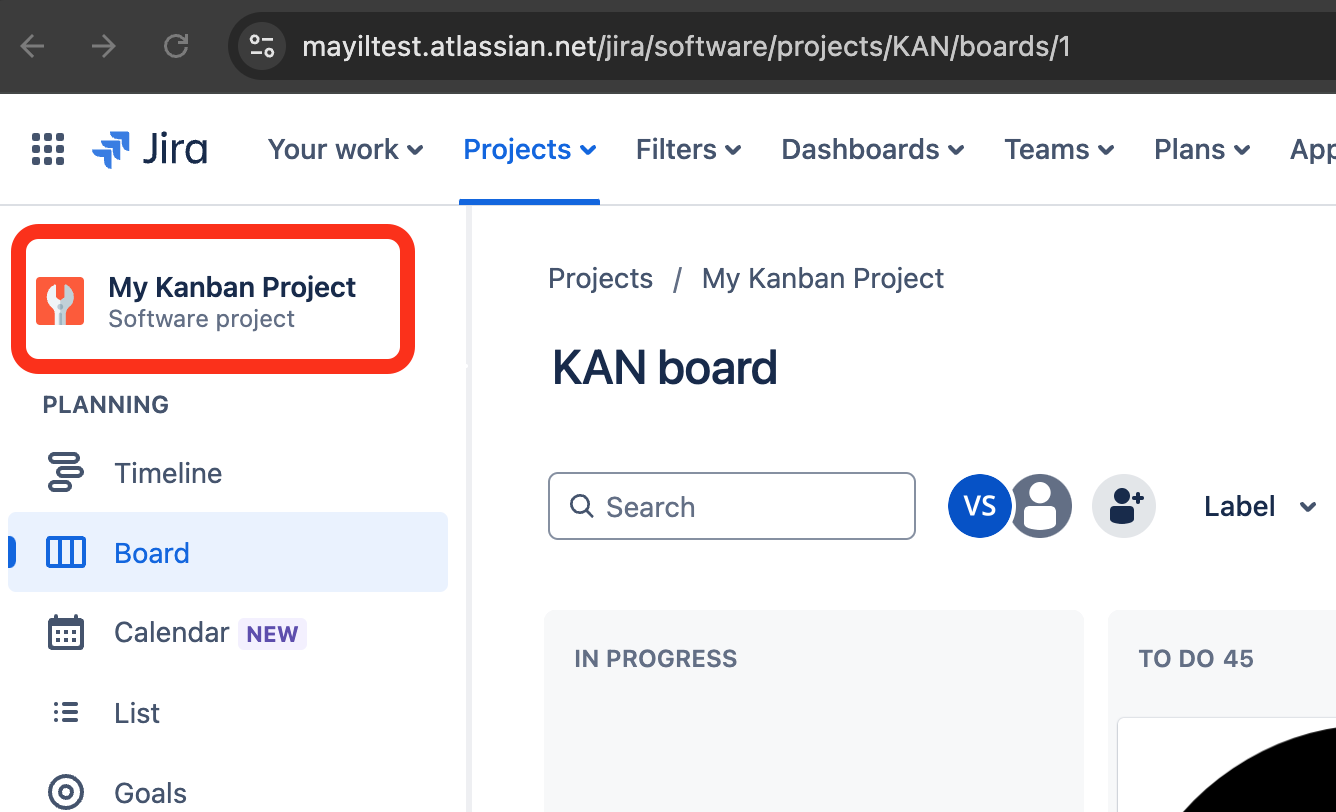
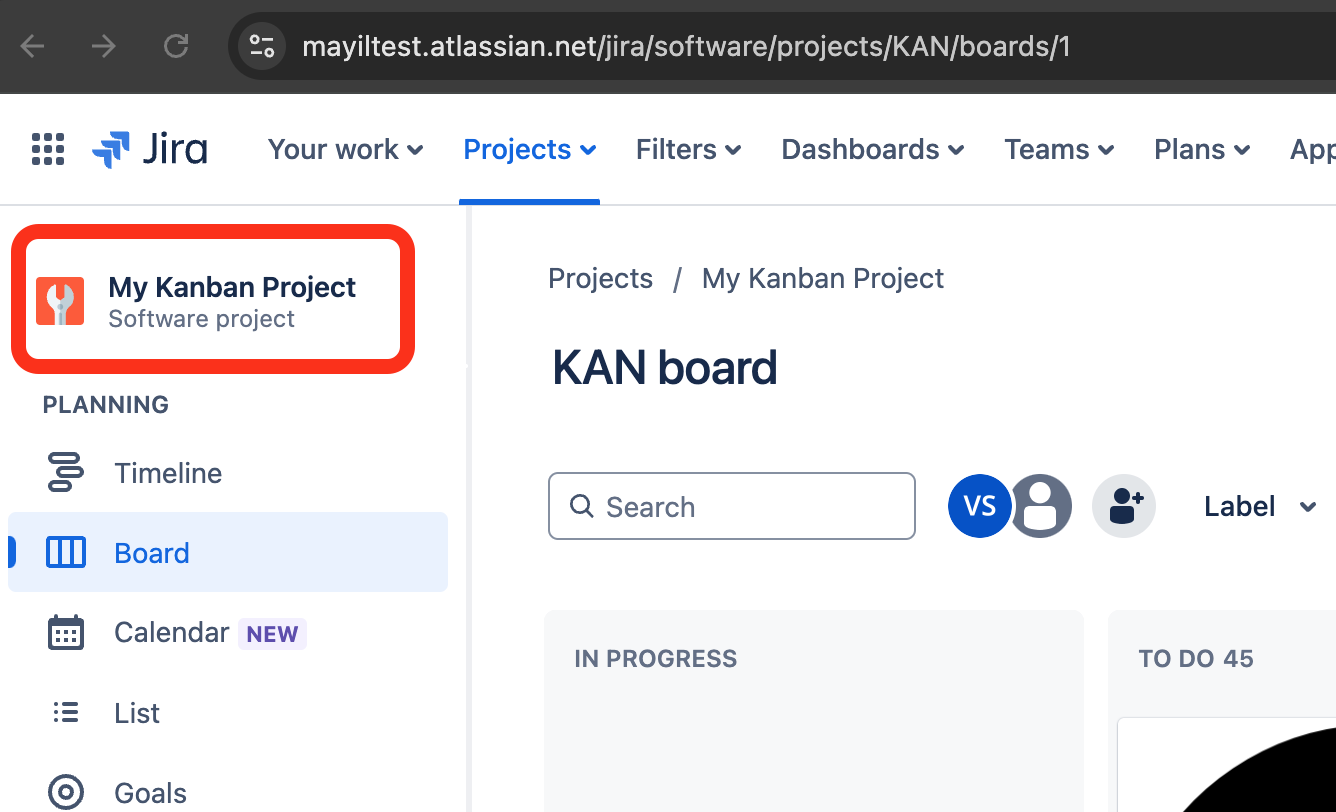
 3. Identify the project name and save it under `Project`. In the example below, it is "My Kanban Project"
 4. Mayil can be configured to not run on a ticket if certain tags are present on that ticket. List the names of those tags under `ignore_labels`. These tags can be called anything.
5. `webhook_secret` will be updated in the section below. After completing that, add this config block to `INTEGRATIONS` as outlined in the [Configuration](./configuration) page.
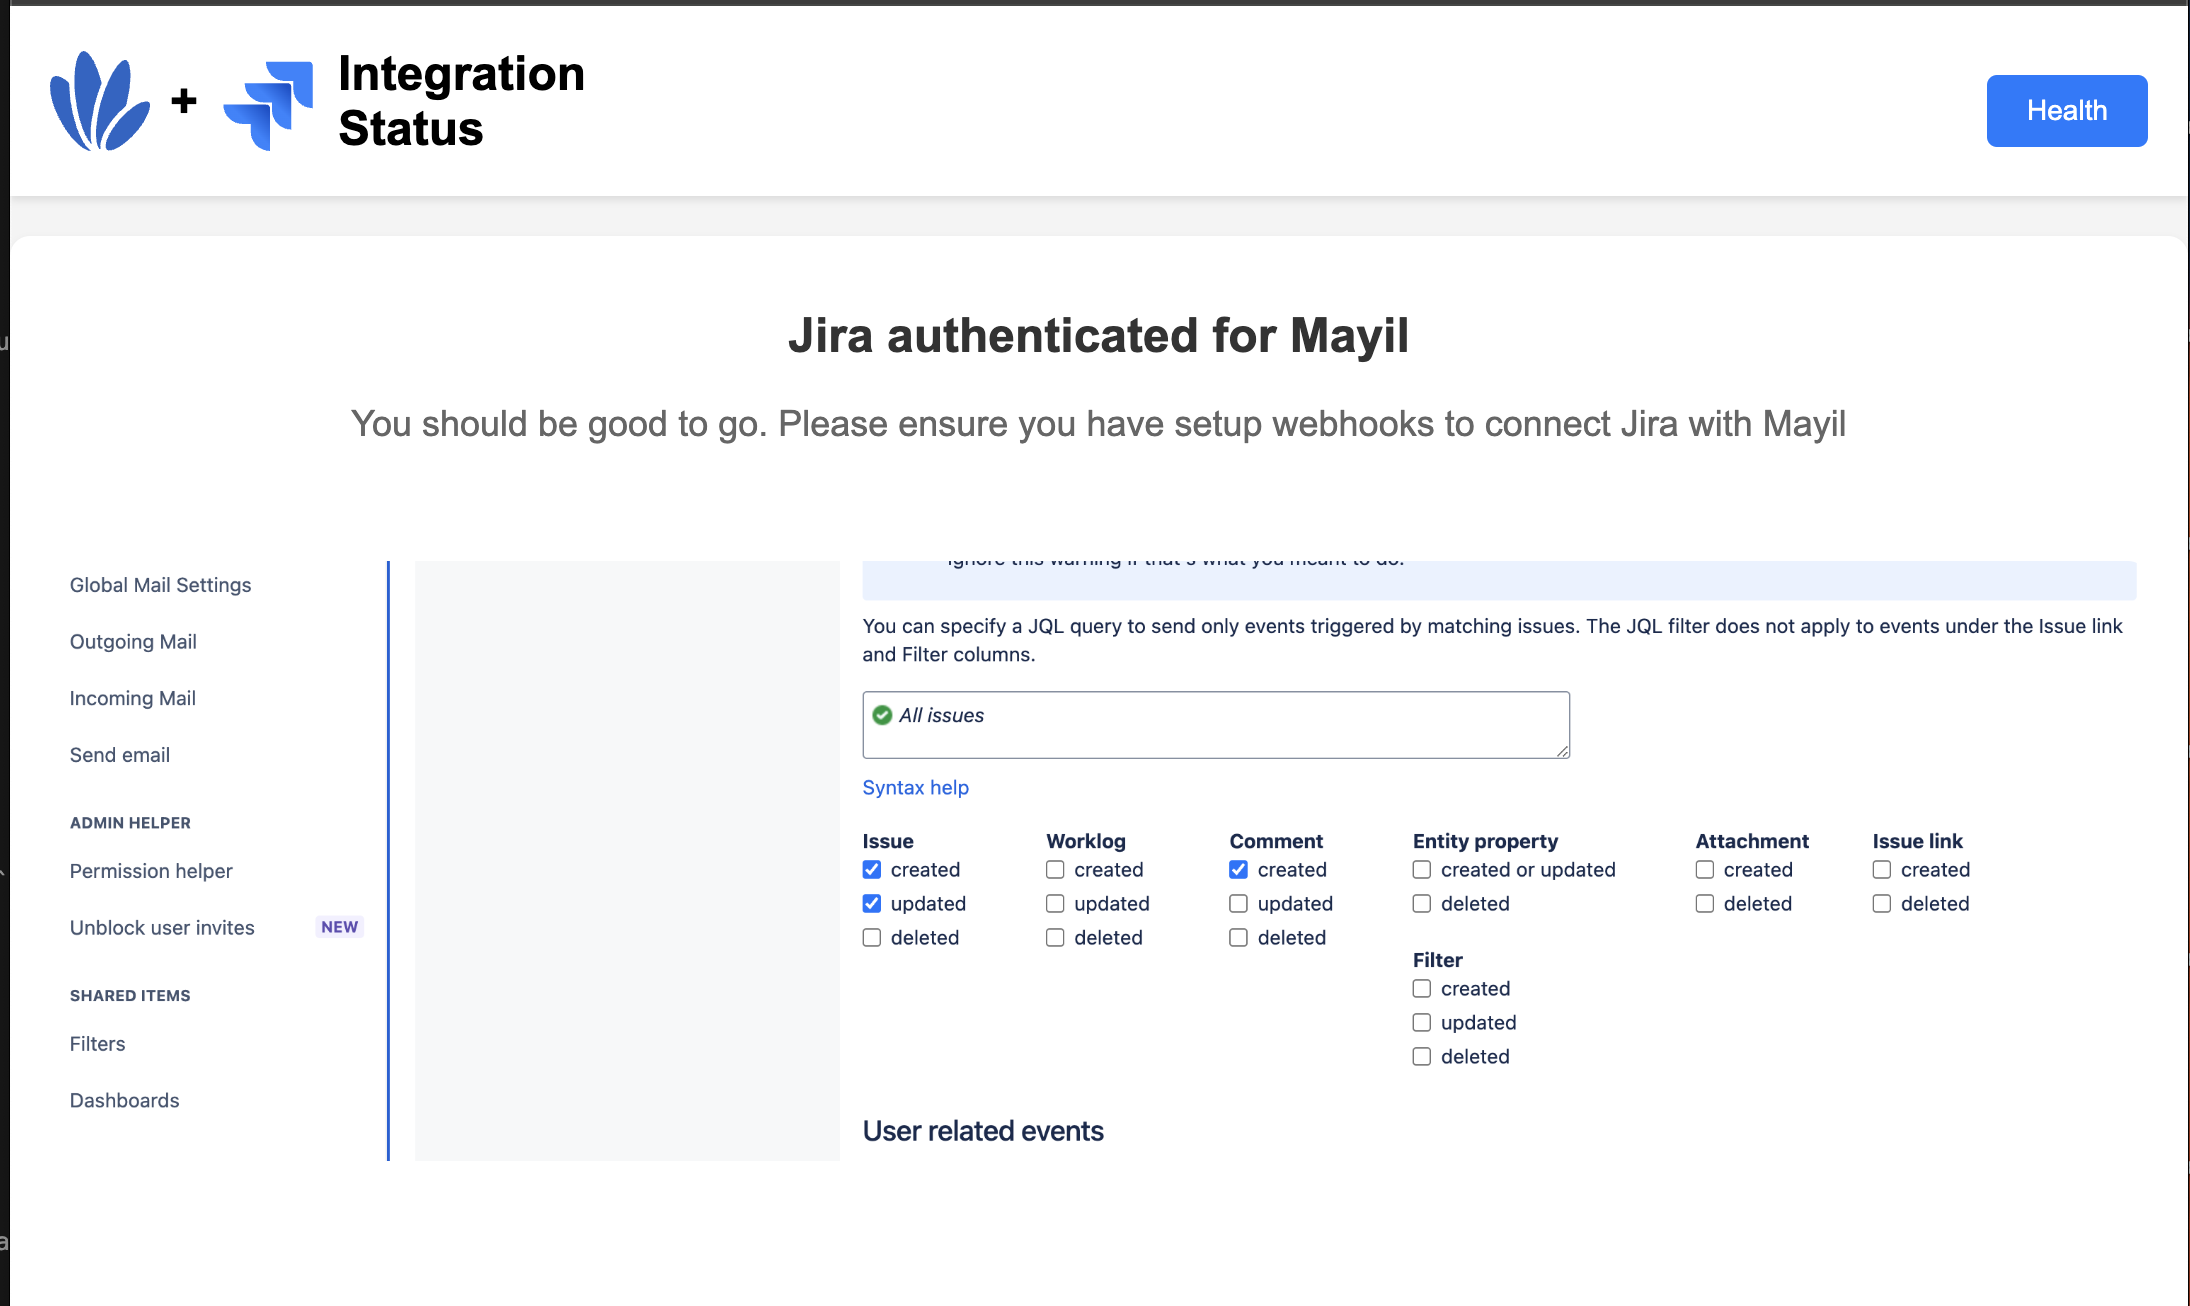
6. Now go to `/api/health` and click on the Jira icon. Follow the instructions there to validate the OAuth app. Once completed, you should see this page-
4. Mayil can be configured to not run on a ticket if certain tags are present on that ticket. List the names of those tags under `ignore_labels`. These tags can be called anything.
5. `webhook_secret` will be updated in the section below. After completing that, add this config block to `INTEGRATIONS` as outlined in the [Configuration](./configuration) page.
6. Now go to `/api/health` and click on the Jira icon. Follow the instructions there to validate the OAuth app. Once completed, you should see this page-
 ## Setting up a webhook
1. Click the Gear icon on Jira > System
## Setting up a webhook
1. Click the Gear icon on Jira > System
 2. Click Webhook from the menu on the left and click Create a Webhook.
3. Enter `mayil-wh-1` under name.
4. Set status as `Enabled`
5. Under URL, enter `/api/webhook/jira/` where deployment is where Mayil's backend API was deployed (An example would be `https://mayil.companyname/api/webhook/jira/`)
6. Set a secret and update `webhook_secret` in the configuration details from the previous step
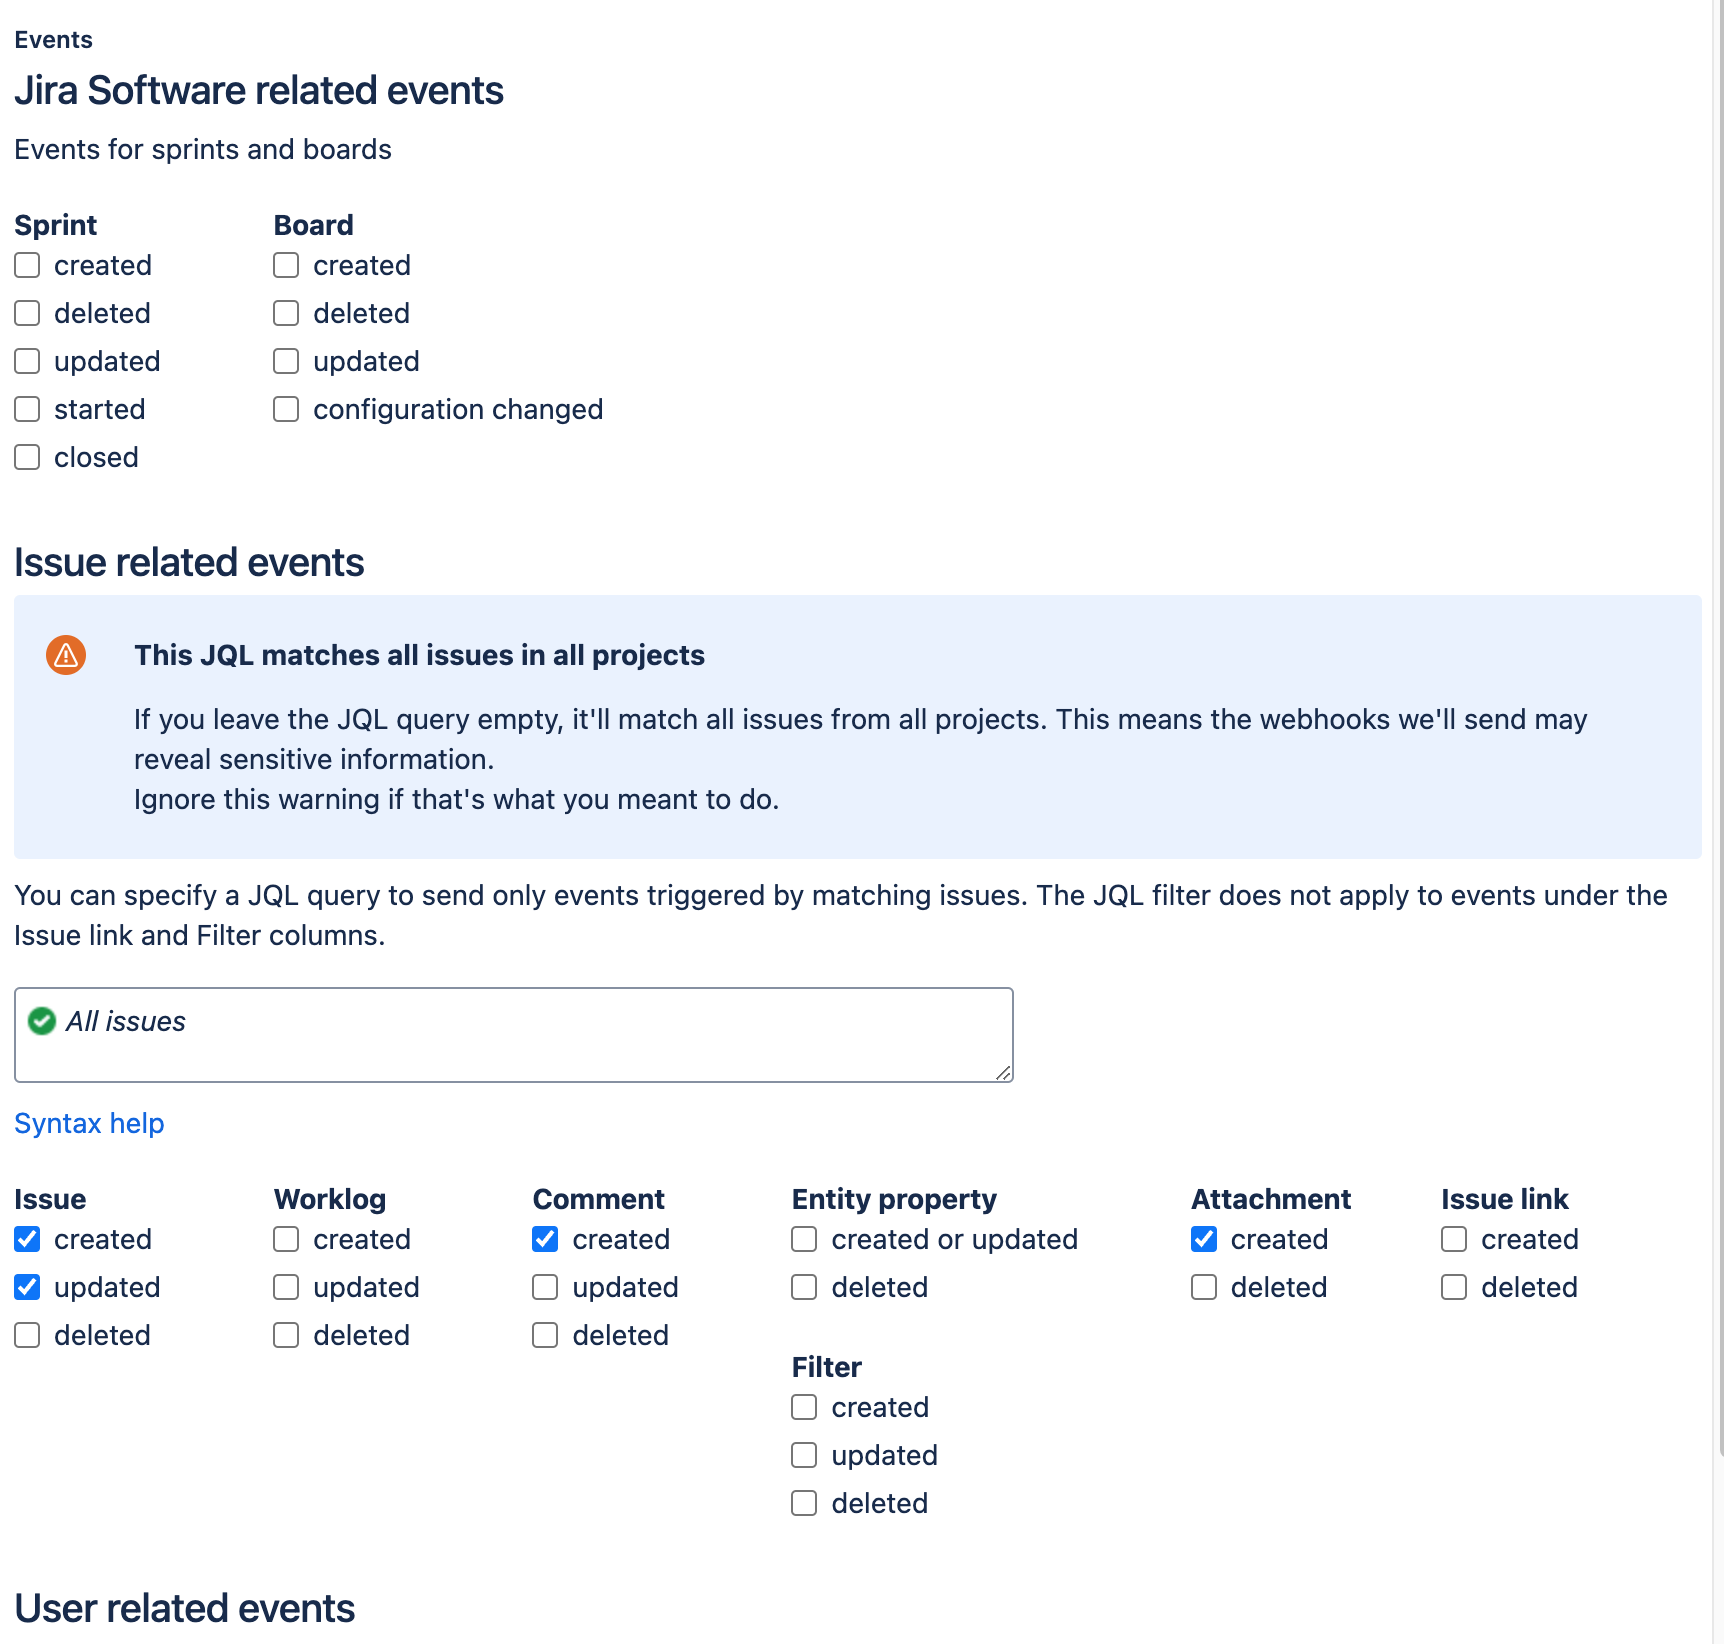
7. Add these Events-
2. Click Webhook from the menu on the left and click Create a Webhook.
3. Enter `mayil-wh-1` under name.
4. Set status as `Enabled`
5. Under URL, enter `/api/webhook/jira/` where deployment is where Mayil's backend API was deployed (An example would be `https://mayil.companyname/api/webhook/jira/`)
6. Set a secret and update `webhook_secret` in the configuration details from the previous step
7. Add these Events-
 8. Click save
***
This completes the Jira setup. A successful setup will be indicated on the health page (`/api/health`)
8. Click save
***
This completes the Jira setup. A successful setup will be indicated on the health page (`/api/health`)